
Knife4j
说明
详细学习可见官网
https://doc.xiaominfo.com/docs
https://doc.xiaominfo.com/
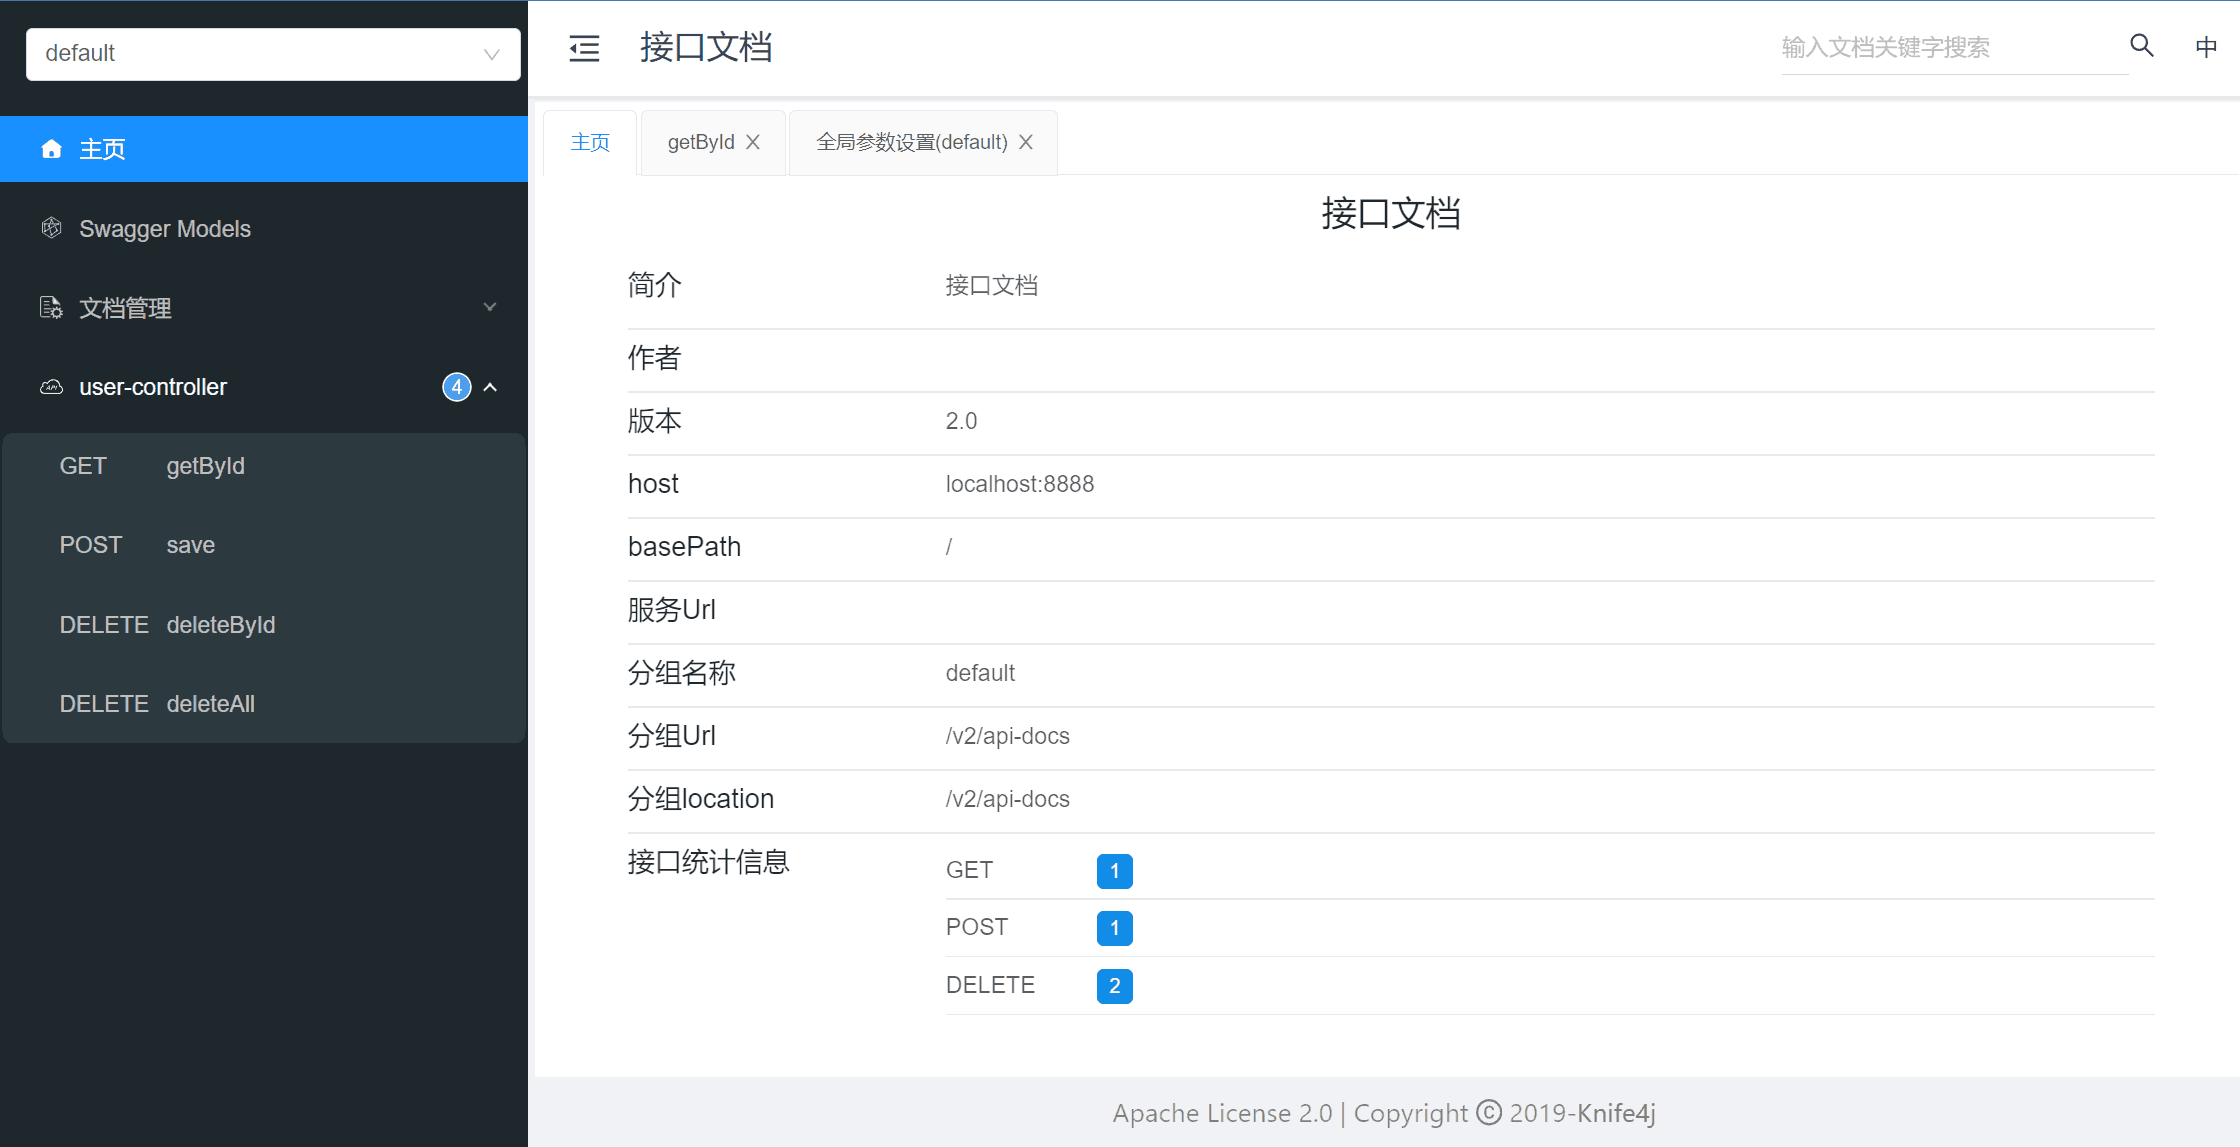
使用Knife4j只需按照它的规范去定义接口以及接口相关信息,就可以做到生成接口文档,以及在线接口调试页面
预览效果
knife4j需要注意版本
- 对于SpringBoot2
- 需要引入maven依赖
1
2
3
4
5
6
7
8
9
10
11
12
13
14
15
16
17<dependency>
<groupId>com.github.xiaoymin</groupId>
<artifactId>knife4j-openapi2-spring-boot-starter</artifactId>
<version>4.4.0</version>
</dependency>
```
- jdk版本:8,11
2. 对于SpringBoot3版本
- 需要引入maven依赖
```xml
<dependency>
<groupId>com.github.xiaoymin</groupId>
<artifactId>knife4j-openapi3-jakarta-spring-boot-starter</artifactId>
<version>4.5.0</version>
</dependency> - jdk版本:17+
- 需要引入maven依赖
SpringBoot2使用Knife4j
导入maven坐标
1
2
3
4
5
6
<!--引入Knife4j的官方start包,该指南选择Spring Boot版本<3.0,开发者需要注意-->
<dependency>
<groupId>com.github.xiaoymin</groupId>
<artifactId>knife4j-openapi2-spring-boot-starter</artifactId>
<version>4.4.0</version>
</dependency>编写配置类
apiInfo:配置主页的一些信息title:标题description:简介termsOfServiceUrl:服务条款网址contact:作者,服务器url,邮箱version:version
groupName:组名apis:这里指定Controller扫描包路径paths:扫描路径PathSelectors.any():所有路径都要被扫描PathSelectors.regex("/use.*"):正则表达式匹配,(以use开头的都匹配)PathSelectors.ant("/user/*"):模式匹配,(user/下的都匹配)也可以选择不写配置类,直接在yml配置文件中配置1
2
3
4
5
6
7
8
9
10
11
12
13
14
15
16
17
18
19
20
21
22
23
24
25
26
27
28
29
30
31
32
33
public class Knife4jConfiguration {
public Docket api() {
//指定使用Swagger2规范
Docket docket=new Docket(DocumentationType.SWAGGER_2)
//描述字段支持Markdown语法
.apiInfo(new ApiInfoBuilder()
//标题
.title("Knife4j接口文档")
//简介
.description("Knife4j测试项目api")
//服务条款网址
.termsOfServiceUrl("https://doc.xiaominfo.com/")
//作者,服务器url,邮箱
.contact(new Contact("xnj","http://localhost:8080","xnj@gmail.com"))
//版本
.version("1.0")
.build())
//组名
.groupName("用户服务")
.select()
//这里指定Controller扫描包路径
.apis(RequestHandlerSelectors.basePackage("com.xnj.controller"))
.paths(PathSelectors.any())//所有路径都要被扫描
/*.paths(PathSelectors.regex("/use.*"))*///正则表达式匹配
/*.paths(PathSelectors.ant("/system/*"))*///模式匹配
.build();
return docket;
}
}1
2
3
4
5
6
7
8
9
10
11
12
13
14
15knife4j:
enable: true
openapi:
title: Xxx管理接口文档 # 标题
description: "接口管理文档" #描述
email: xiaoymin@foxmail.com
concat: xnj # 作者
url: https://xxx.xusir.fun
version: v1.0.0
group:
default:
group-name: default #分组名称
api-rule: package
api-rule-resources:
- com.itheima.mp.controller
应用以及常用的相关注解
实体类中
@ApiModel(value = "xxx"):用在实体类上@ApiModelProperty(value = "xxx"):用在实体类属性上,描述属性信息
1
2
3
4
5
6
7
8
9
10
public class User {
private Integer id;
private String name;
private String password;
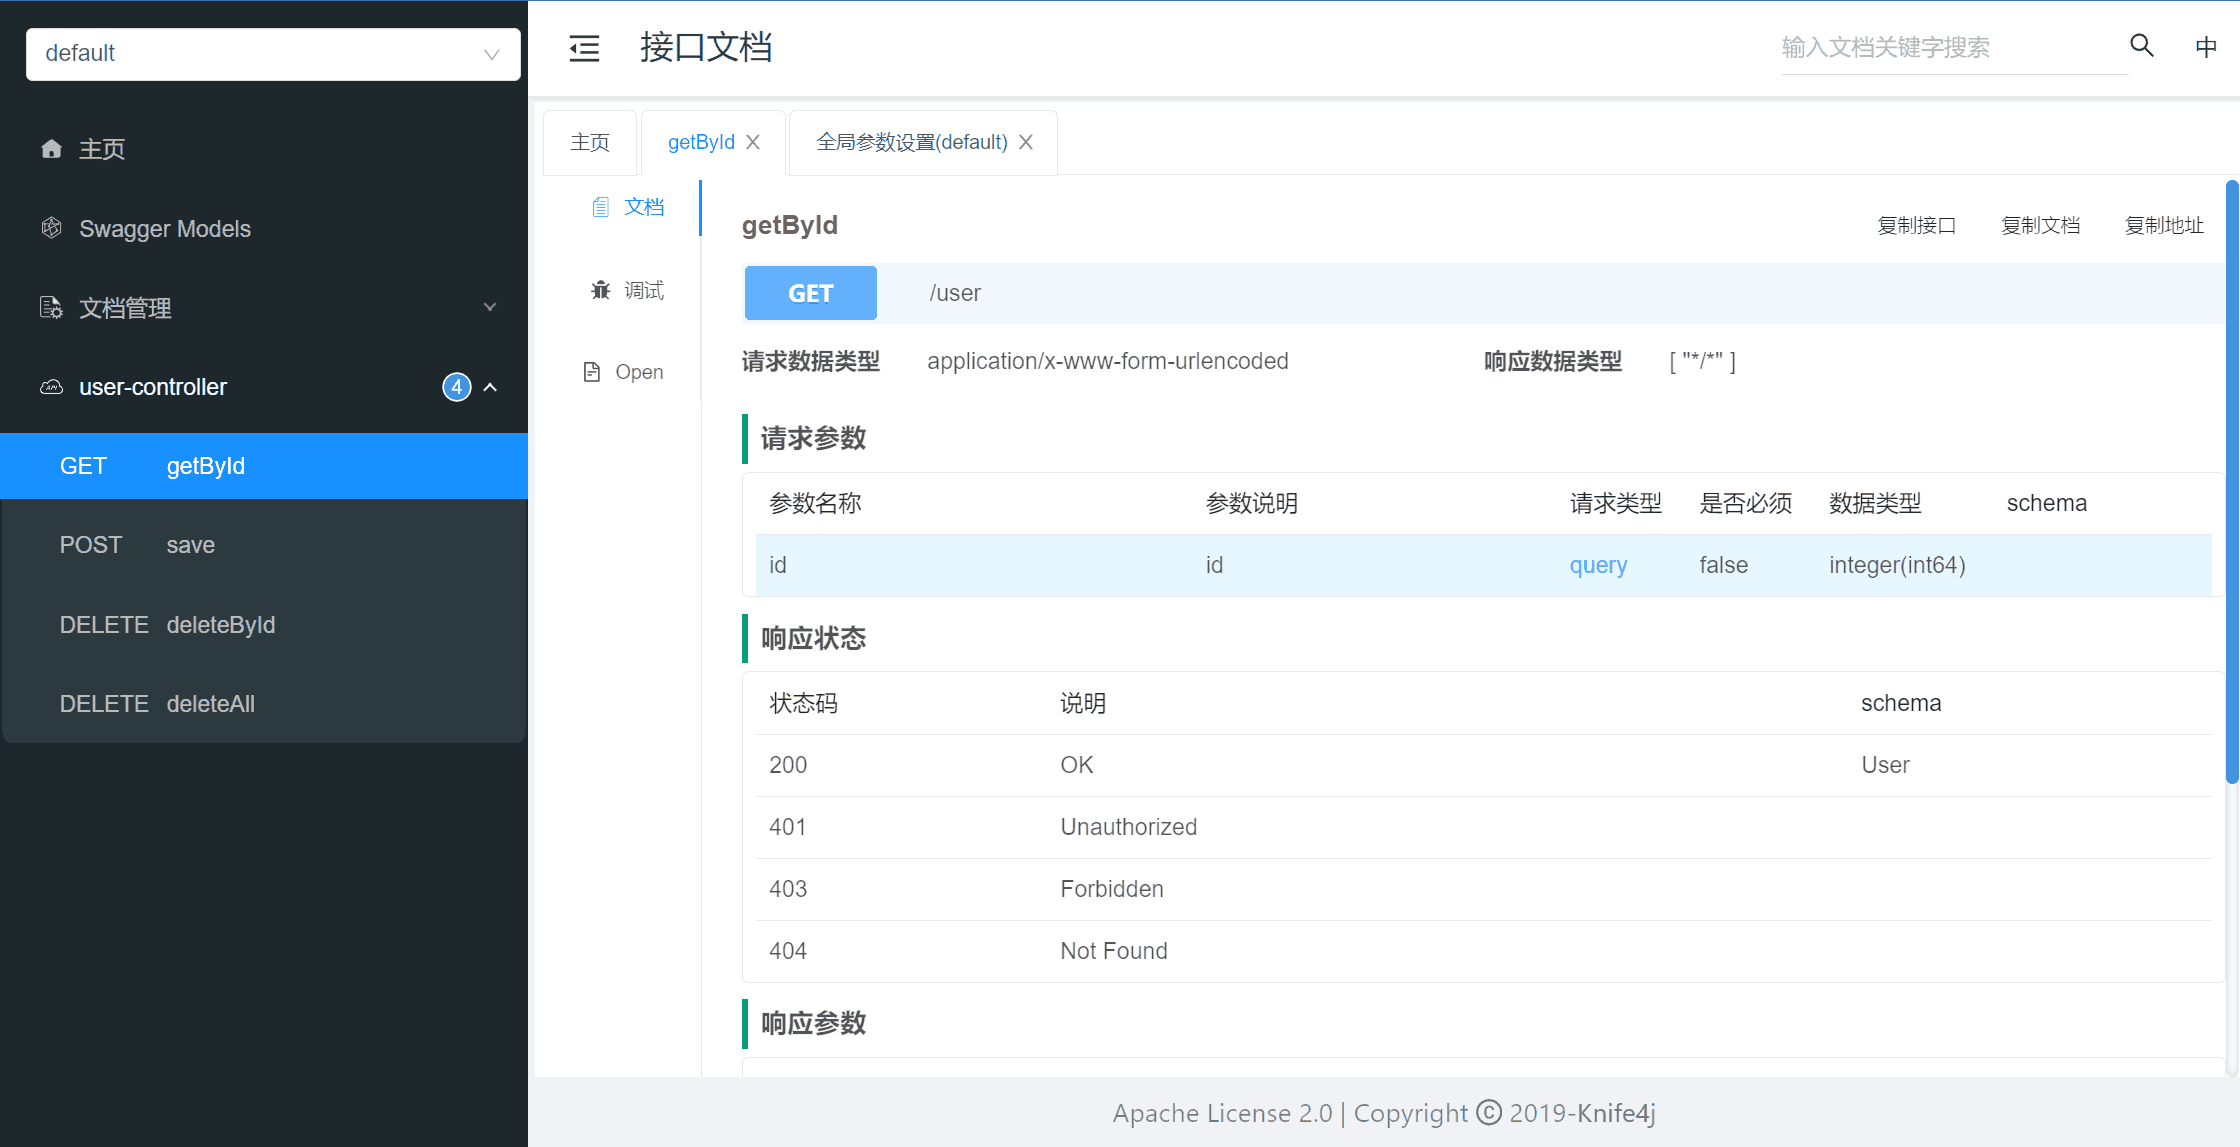
}对于controller
@Api(tags="xx"):用于controller类上对类的说明
在接口管理的界面中,左边菜单栏就会显示我们的注解内容,而不是该controller的类名@ApiOperation("xxx"):用在controller下的方法上
在接口文档中左边点开该controller目录,下边显示的会是我们在注解中的内容,而不是方法名@ApiImplicitParam(name = "xx",value = "xx",required = true):描述参数
在接口管理界面中,文档中对该接口的请求参数说明就会显示我们的注解内容
1
2
3
4
5
6
7
8
9
10
11
12
13
14
15
public class UserController {
public User getById( Integer id) {
User user = new User();
user.setId(id);
user.setName("zhangsan");
user.setPassword("123456");
return user;
}
}1
2
3
4
5
6
7
8
9
10
11// 描述类
public class SystemController {
// 描述接口
// 描述参数
public String hello( String name) {
return "你好,"+name;
}
}
访问
启动项目,访问localhost:8080/doc.html即可看到
SpringBoot3使用Knife4j
Spring Boot 3 只支持OpenAPI3规范
Knife4j提供的starter已经引用springdoc-openapi的jar,开发者需注意避免jar包冲突
JDK版本必须 >= 17
说明
- knife4j有多个版本,最新版的Knife4j基于开源项目
springdoc-openapi,这个开源项目的核心功能就是根据SpringBoot项目中的代码自动生成符合OpenAPI规范的接口信息。 - OpenAPI规范定义接口文档的内容和格式,其前身是
Swagger规范。
- knife4j有多个版本,最新版的Knife4j基于开源项目
引入maven依赖
1
2
3
4
5<dependency>
<groupId>com.github.xiaoymin</groupId>
<artifactId>knife4j-openapi3-jakarta-spring-boot-starter</artifactId>
<version>4.5.0</version>
</dependency>编写配置类
- 对于
OpenAPI方法中的内容就是接口文档的主页中的内容title:标题description:简介version:版本号
- 对于
GroupedOpenApi方法就是分组,点击接口文档左上角来切换分组group:组名,见左上角pathsToMatch:路径管理,及该分组下包含的路径
其形参是字符串数组,可以写多个参数1
2
3
4
5.pathsToMatch(
"/user/login/**",
"/user/info",
"user/shop/**"
)
1
2
3
4
5
6
7
8
9
10
11
12
13
14
15
16
17
18
19
20
21
22
23
24
25
26
27
28
29
30
public class Knife4jConfiguration {
public OpenAPI openAPI(){
return new OpenAPI()
.info(new Info()
.title("knife4jTest项目API")
.version("1.0")
.description("knife4jTest项目的接口文档"));
}
public GroupedOpenApi systemApi(){
return GroupedOpenApi.builder()
.group("系统信息管理")
.pathsToMatch("/system/**")
.build();
}
public GroupedOpenApi userApi(){
return GroupedOpenApi.builder()
.group("用户信息管理")
.pathsToMatch("/user/**")
.build();
}
}注意:该配置类并不是必须的,这个库会自动配置 Knife4j,并生成接口文档,写配置类只是为了增强可观性和分组管理
- 对于
应用以及常用的相关注解
- 实体类中
@Schema(description = "xxx"):可以用于描述类和属性
如下的类作为响应参数时,在接口文档中就会在参数说明中显示我们的各描述信息1
2
3
4
5
6
7
8
9
10
public class User {
private Integer id;
private String username;
private String password;
}1
2
3
4
5
6
7
8
9
10
11
12
13
14
15//菜单目录名
public class UserController {
public User get( Integer id){
User user = new User();
user.setId(id);
user.setUsername("张三");
user.setPassword("123456");
return user;
}
}
- 对于controler
@Tag(name="xx管理"):用在controller类上
在接口管理的界面中,左边菜单栏就会显示我们的注解内容,而不是该controller的类名@Operation(summary = "xxx接口"):用在controller下的方法上
在接口文档中左边点开该controller目录,下边显示的会是我们在注解中的内容,而不是方法名@Parameter(description = "xxx"):用在形参中描述形参
在接口管理界面中,文档中对该接口的请求参数说明就会显示我们的注解内容1
2
3
4
5
6
7
8
9
10
11
12
13
14
15
16//菜单目录名
//注意导包 import io.swagger.v3.oas.annotations.tags.Tag;
public class UserController {
public User get( Integer id){
User user = new User();
user.setId(id);
user.setUsername("张三");
user.setPassword("123456");
return user;
}
}
- 实体类中
访问
默认路径为:http://localhost:8080/doc.html
本博客所有文章除特别声明外,均采用 CC BY-NC-SA 4.0 许可协议。转载请注明来自 XuSir'Blog!


评论