
SpringCache
Spring Cache
Spring Cache是一个框架,实现了基于注解的缓存功能,只需要简单地加一个注解,就能实现缓存功能。
Spring Cache提供了一层抽象,底层可以切换不同的缓存实现,例如:
- EHCache
- Caffeine
- Redis
导入springcache的坐标1
2
3
4
5<dependency>
<groupId>org.springframework.boot</groupId>
<artifactId>spring-boot-starter-cache</artifactId>
<version>2.7.3</version>
</dependency>
而需要实现哪种缓存,只需要导入相应的坐标就行了
如使用Redis来作为缓存实现,即将数据存到Redis中,下面的讲解也用Redis来讲解1
2
3
4<dependency>
<groupId>org.springframework.boot</groupId>
<artifactId>spring-boot-starter-data-redis</artifactId>
</dependency>
SpringCache常用注解:
| 注解 | 说明 |
|---|---|
| @EnableCaching | 开启缓存注解功能,通常加在启动类上 |
| @Cacheable | 在方法执行前先查询缓存中是否有数据,如果有数据,则直接返回缓存数据;如果没有缓存数据,调用方法并将方法返回值放到缓存中 |
| @CachePut | 将方法的返回值放到缓存中 |
| @CacheEvict | 将一条或多条数据从缓存中删除 |
通过案例来了解SpringCache
查看案例环境
pom.xml1
2
3
4
5
6
7
8
9
10
11
12
13
14
15
16
17
18
19
20
21
22
23
24
25
26
27
28
29
30
31
32
33
34
35
36
37
38
39
40
41
42
43
44
45
46
47
48
49
50
51
52
53
54
55
56
57
58
59
60
61
62
63
64
65
66
67
68
69
70
71<dependencies>
<dependency>
<groupId>org.springframework.boot</groupId>
<artifactId>spring-boot-starter-web</artifactId>
<scope>compile</scope>
</dependency>
<dependency>
<groupId>org.projectlombok</groupId>
<artifactId>lombok</artifactId>
<version>1.18.20</version>
</dependency>
<dependency>
<groupId>com.alibaba</groupId>
<artifactId>fastjson</artifactId>
<version>1.2.76</version>
</dependency>
<dependency>
<groupId>commons-lang</groupId>
<artifactId>commons-lang</artifactId>
<version>2.6</version>
</dependency>
<dependency>
<groupId>org.springframework.boot</groupId>
<artifactId>spring-boot-starter-cache</artifactId>
</dependency>
<dependency>
    <groupId>org.springframework.boot</groupId>
    <artifactId>spring-boot-starter-data-redis</artifactId>
</dependency>
<dependency>
<groupId>mysql</groupId>
<artifactId>mysql-connector-java</artifactId>
<scope>runtime</scope>
</dependency>
<dependency>
<groupId>org.mybatis.spring.boot</groupId>
<artifactId>mybatis-spring-boot-starter</artifactId>
<version>2.2.0</version>
</dependency>
<dependency>
<groupId>com.alibaba</groupId>
<artifactId>druid-spring-boot-starter</artifactId>
<version>1.2.1</version>
</dependency>
<dependency>
<groupId>com.github.xiaoymin</groupId>
<artifactId>knife4j-spring-boot-starter</artifactId>
<version>3.0.2</version>
</dependency>
<dependency>
<groupId>org.springframework.boot</groupId>
<artifactId>spring-boot-starter-test</artifactId>
</dependency>
</dependencies>
<build>
<plugins>
<plugin>
<groupId>org.springframework.boot</groupId>
<artifactId>spring-boot-maven-plugin</artifactId>
<version>2.7.3</version>
</plugin>
</plugins>
</build>
sql脚本1
2
3
4
5
6
7
8DROP TABLE IF EXISTS `user`;
CREATE TABLE `user` (
`id` bigint NOT NULL AUTO_INCREMENT,
`name` varchar(45) DEFAULT NULL,
`age` int DEFAULT NULL,
PRIMARY KEY (`id`)
);
配置文件application.yml1
2
3
4
5
6
7
8
9
10
11
12
13
14
15
16
17
18
19
20
21
22server:
port: 8888
spring:
datasource:
druid:
driver-class-name: com.mysql.cj.jdbc.Driver
url: jdbc:mysql://localhost:3306/springcachedemo?serverTimezone=Asia/Shanghai&useUnicode=true&characterEncoding=utf-8&zeroDateTimeBehavior=convertToNull&useSSL=false&allowPublicKeyRetrieval=true
username: root
password: 123456
redis:
host: localhost
port: 6379
database: 1
# password: 123456
logging:
level:
com:
itheima:
mapper: debug
service: info
controller: info
实体类User1
2
3
4
5
6
7
8
9
10
11
12
public class User implements Serializable {
private static final long serialVersionUID = 1L;
private Long id;
private String name;
private int age;
}
UserMapper1
2
3
4
5
6
7
8
9
10
11
12
13
14
15
16@Mapper
public interface UserMapper{
@Insert("insert into user(name,age) values (#{name},#{age})")
@Options(useGeneratedKeys = true,keyProperty = "id")
void insert(User user);
@Delete("delete from user where id = #{id}")
void deleteById(Long id);
@Delete("delete from user")
void deleteAll();
@Select("select * from user where id = #{id}")
User getById(Long id);
}
控制层controller1
2
3
4
5
6
7
8
9
10
11
12
13
14
15
16
17
18
19
20
21
22
23
24
25
26
27
28
29
30
31
32
public class UserController {
private UserMapper userMapper;
public User save( User user){
userMapper.insert(user);
return user;
}
public void deleteById(Long id){
userMapper.deleteById(id);
}
public void deleteAll(){
userMapper.deleteAll();
}
public User getById(Long id){
User user = userMapper.getById(id);
return user;
}
}
使用Swagger来调试接口1
2
3
4
5
6
7
8
9
10
11
12
13
14
15
16
17
18
19
20
21
22
23
24
25
26
27
28
29
30
31
32
33
34
35
36
37
38
39
public class WebMvcConfiguration extends WebMvcConfigurationSupport {
/**
* 生成接口文档配置
* @return
*/
public Docket docket(){
log.info("准备生成接口文档...");
ApiInfo apiInfo = new ApiInfoBuilder()
.title("接口文档")
.version("2.0")
.description("接口文档")
.build();
Docket docket = new Docket(DocumentationType.SWAGGER_2)
.apiInfo(apiInfo)
.select()
//指定生成接口需要扫描的包
.apis(RequestHandlerSelectors.basePackage("com.itheima.controller"))
.paths(PathSelectors.any())
.build();
return docket;
}
/**
* 设置静态资源映射
* @param registry
*/
protected void addResourceHandlers(ResourceHandlerRegistry registry) {
log.info("开始设置静态资源映射...");
registry.addResourceHandler("/doc.html").addResourceLocations("classpath:/META-INF/resources/");
registry.addResourceHandler("/webjars/**").addResourceLocations("classpath:/META-INF/resources/webjars/");
}
}
先在启动类上加上@EnableCaching来开启缓存注解
插入数据时并存入缓存
比如现在需要执行插入操作,希望在插入同时存入redis中@CachePut(cacheNames = "",key = ""),其中key有多种格式1
2
3
4
5
6
7
8
//key生成为userCache::2,即key为cacheNames::2
//@CachePut(cacheNames = "userCache",key = "#result.id")//result即对应为方法返回值
//@CachePut(cacheNames = "userCache",key = "#p0.id")//`#p0`即为方法第一个参数,或写为`#a0`也一样,还有`#root.args[0]`
public User save( User user){
userMapper.insert(user);
return user;
}
运行,插入{"age": 2,"name": "zhangshan"}数据,save方法执行完成后,就会将返回结果的user保存到redis中,如果用户id为2,key为userCache::2
redis中保存为树形结构:userCache目录下的,[Empty]目录下,的key为:userCache::2,值为存入的user对象数据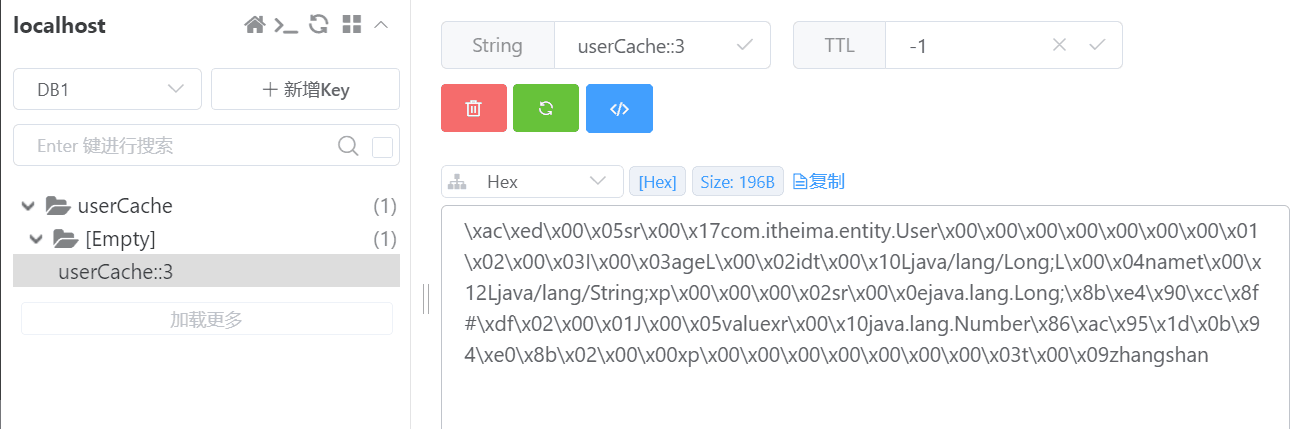
查询时先查询缓存
@Cacheable(cacheNames = "",key = "")1
2
3
4
5
6
7
public User getById(Long id){
log.info("查询用户信息");
User user = userMapper.getById(id);
return user;
}
运行如上接口时,会先去Redis中查询有无数据,当缓存中有目标数据时,便直接返回数据,不再走方法内的逻辑,如果缓存中没有,则会执行方法内逻辑查询数据库,
如果数据库中查询到了数据并返回,cache便会把它存入Redis中,下次查询就会直接走缓存
删除数据时并清理缓存
1.清理一条数据@CacheEvict(cacheNames = "",key = "")1
2
3
4
5
//key为cacheNames::2
public void deleteById(Long id){
userMapper.deleteById(id);
}
在执行完上述接口时,cache会把Redis中的的数据也删除
2.清理所有数据@CacheEvict(cacheNames = "",allEntries = true)1
2
3
4
5
//删除userCache中的所有数据
public void deleteAll(){
userMapper.deleteAll();
}
前面说过,存入Redis中的数据是树形结构的,最外面的目录就是cacheNames的值
在参数上添加allEntries = true,便会把该目录下所有数据连同目录都一并删除